Water Pressure Reduction Valve Installation Guide
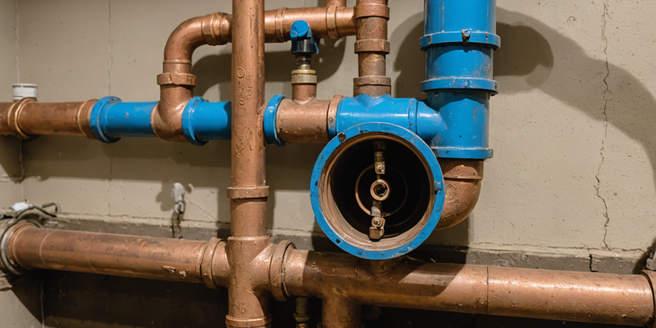
Understanding Water Pressure and Why It Matters
Water pressure is the force at which water travels through your home’s plumbing system, measured in pounds per square inch (PSI). Most municipal water systems maintain pressure between 40-80 PSI to efficiently deliver water to all households. However, excessive pressure can cause significant damage to your plumbing infrastructure. High water pressure puts constant stress on pipes, fixtures, and appliances, leading to premature wear and failure. You can easily check your home’s water pressure using an inexpensive pressure gauge attached to an outdoor faucet. Over time, this strain can result in leaks, burst pipes, and expensive repairs. Understanding your home’s water pressure is crucial for maintaining a healthy plumbing system. Pressure reduction valves help regulate incoming water pressure to safe levels, protecting your investment and extending the lifespan of your plumbing components.
Signs Your Home Has High Water Pressure
Recognizing high water pressure symptoms early can prevent costly damage. Common signs include banging or clanking noises when turning off faucets, which occurs when water flow suddenly stops. You may notice reduced water flow from fixtures or frequent leaks at joint connections. Showerheads and faucet aerators may spray inconsistently due to excessive pressure. Appliances like washing machines and dishwashers may have shorter lifespans than expected. Water heaters may produce hammering sounds or leak prematurely. Toilets might run continuously or require frequent repairs. If you notice any of these warning signs, checking your water pressure is essential. Most municipalities recommend keeping water pressure between 40 and 80 PSI for optimal performance. A simple pressure gauge can measure your PSI and confirm whether high pressure is your issue.
Tools and Materials You’ll Need
Before beginning installation, gather essential tools and materials. You’ll need an adjustable wrench or pipe wrench for removing and tightening fittings. A pressure gauge helps measure your water pressure before and after installation. Teflon tape prevents leaks at threaded connections. Have a bucket ready to catch residual water. A flathead screwdriver assists with adjusting valve settings. Your pressure reduction valve kit should include the valve, mounting bracket, and instruction manual. Consider having a flashlight available for better visibility if your water main is in dim areas. Thread sealant compound provides extra protection against leaks. It’s also wise to keep towels or rags nearby to wipe connections and dry work surfaces during the installation process. Ensure you have the correct valve size matching your main water line diameter. Having all materials prepared beforehand prevents frustrating interruptions.
Safety Precautions Before Starting Installation
Safety should be your top priority before beginning any plumbing work. First, shut off your main water supply completely to prevent flooding or water spray during installation. Open all faucets throughout your home to release remaining pressure and water in the pipes. Wear safety glasses to protect against debris and water spray. Have towels or a bucket nearby to contain spillage. Never work on your plumbing system while water pressure is active. Allow adequate time for the system to depressurize fully. Review your valve’s instruction manual thoroughly before starting. Keep a flashlight handy to ensure you can see clearly in dimly lit areas under sinks and in crawl spaces. If you have concerns about your abilities, consult a licensed plumber. Working with pressurized water systems can be dangerous without proper precautions.
Locating Your Water Main Shut-Off Valve
Finding your water main shut-off valve is the critical first step. This valve typically resides where the water supply enters your home from the street or well. Check your basement, crawlspace, or utility room first. Look along exterior walls where the main water line enters. Some homes have shut-off valves in their yard, marked by a covered box near the property line. Consult your home’s blueprints if available for exact location details. Contact your local water utility if you cannot locate it. Once found, test the valve by turning it slowly to ensure it operates smoothly. Mark the valve location with bright tape or paint so you can find it quickly during a crisis. Avoid forcing stuck valves as this may cause damage. Knowing your shut-off valve’s location is essential for emergencies.
Removing the Old Valve or Preparing the Pipe
If replacing an existing valve, drain the system completely before removal. Use your wrench to carefully loosen the fitting connections on both sides of the old valve. Turn counterclockwise slowly to prevent sudden water release. Once loose enough, unscrew by hand to avoid over-tightening complications. Catch any remaining water with towels. Inspect the male threads on both connection points for damage or debris. Clean the threads thoroughly using a cloth. If threads are damaged, you may need to cut new threads or use thread repair kits. For new installations on bare pipe, ensure the pipe end is clean and smooth. Test-fit the new valve before applying any tape to verify proper alignment. Make sure the valve orientation allows for proper flow direction through the system. Apply Teflon tape clockwise around male threads several times for secure sealing.
Installing Your New Pressure Reduction Valve
Carefully position your new pressure reduction valve in the correct orientation, noting the flow direction arrow on the valve body. This arrow should point toward your home’s fixtures, away from the main supply. Apply Teflon tape to the male threads on both connection points clockwise. Screw the valve hand-tight first to ensure proper alignment. Use your wrench to tighten the connections firmly without over-tightening, which can crack fittings. Ensure the valve is level and secure. Check that the adjustment screw is accessible for future modifications. Install a pressure gauge downstream from your valve if desired. Before opening the main supply, place a bucket or towel beneath all connection points to catch any residual water. Turn on the main water supply slowly, checking carefully for leaks at all connection points.
Testing and Adjusting Your Valve Settings
After installation, test your water pressure using a pressure gauge connected to an outdoor faucet. Record the initial reading to establish your baseline. Most valves arrive preset to around 50-60 PSI, suitable for most homes. If pressure exceeds 80 PSI, adjustment is necessary. Locate the adjustment screw on your valve, typically a large bolt or nut on top. Turn clockwise to increase pressure or counterclockwise to decrease it. Make small quarter-turn adjustments and retest after each change. Allow time for pressure to stabilize between adjustments. High water pressure can damage pipes and appliances, making proper regulation essential for home protection. Ideal household pressure ranges between 40-60 PSI. It’s important to check your gauge readings carefully to ensure accuracy throughout the adjustment process. Document your final settings for future reference.
Maintenance Tips for Long-Term Performance
Regular maintenance ensures your pressure reduction valve operates efficiently for years. Check your pressure gauge monthly to monitor consistent performance. Listen for unusual noises indicating potential issues requiring attention. Inspect all connection points periodically for moisture or leaks. Clean your gauge’s screen if pressure readings become inconsistent. Some valves require annual cleaning to remove mineral deposits from water supply. Consult your manufacturer’s guidelines for specific maintenance schedules. Replace inlet screens if they become clogged with sediment. Test your valve annually under various water usage conditions. Keep your adjustment settings documented for reference. Maintaining detailed records helps you spot when maintenance is due before problems arise. Document any changes in pressure readings to identify patterns early. If problems persist despite maintenance efforts, consider professional service or valve replacement.